Using a Whetstone or a Diamond Stone
 Pick an angle to sharpen your knife. If you already know what angle your knife is sharpened at, you’ll probably wish to sharpen it at this angle again. Sharpening at a different angle will take significantly more time and may take a few goes before any rough angles are smoothed out. If you don’t know the current angle, ask the manufacturer of your knife or inquire at a knowledgeable knife shop to determine what angle is appropriate for your knife. If you have to make a gut decision, choose an angle of 10° – 30° per side. Shallower angles make a sharper edge that doesn’t last as long; steeper angles are more durable, so 17° – 20° is a good compromise between the two.
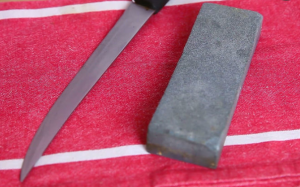
 Lubricate your whetstone or diamond stone with a small amount of mineral oil. Look for honing oil, a light kind of mineral oil. Honing oil will both lubricate the whetstone, making it easier for the blade of the knife to pass over the stone, as well as keep the steel shavings (the by-product of sharpening) from clogging the stone’s pores. Check with the manufacturer’s guidelines for your stone regarding lubrication. The most common sharpening stones are carborundum stones, and are designed to be used wet or dry, but are destroyed when oiled. However, there are some stones that are specifically designed for oil, and will generally be labeled as “oil stones”.
 Use an angle guide to control your edge’s angle, if available. A sharpening guide is a small tool that’s placed underneath the knife in order to maintain a constant angle when scraping the knife across the surface of the stone. Otherwise, you will have to control the angle by hand, which is hard and requires a well-formed perception of angles. One of the most difficult aspects of sharpening a knife is getting the angle right. To make this process a bit easier, try painting the very tip of both sides of your blade with a sharpie pen. Then, throughout the sharpening, inspect whether the marker is being removed during the process.
 Start off on the rough grit side of the stone. Check the grit on your stone, or the packaging that came with the stone, to identify which is which. In general, whetstones and diamond stones each have different grits on either side. The rough grit side is used to grind the steel down, while the fine grit side is used to sharpen or hone the knife. The grinding process comes first, so you start on the rough grit side.
 For a symmetrical edge, sharpen the knife by dragging it across the stone in the opposite direction you would move it to slice a thin layer off the stone. This allows a burr to form and prolongs the stone’s life.
 Continue grinding at this angle until your grind goes roughly halfway through the steel. This doesn’t need to be precise, just well-estimated. For a one-sided edge (“scandi grind”, “chisel grind”, etc.), do not flip the knife when instructed to do so by this article.
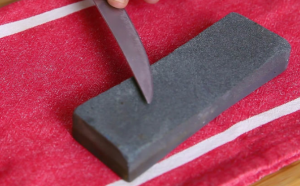 Flip the knife over and sharpen the other side of the blade until you create a new edge. The easiest way to determine that you have removed enough metal is to sharpen until you have raised a burr, a feature that steel will naturally form when one bevel is ground until it meets another. Burrs will generally be too small to see, but you can feel it scraping/catching on your thumb if you stroke away (dull side of the knife to the sharp) from the edge. Finer stones produce smaller burrs, but they are still there.
 Flip the stone over and begin sharpening one side the blade, this time using the finer grit. Your goal here is to smooth over and eliminate the burrs created by sharpening the knife over the coarser grit. This transforms the blade edge from a ground edge into a finer, honed edge.
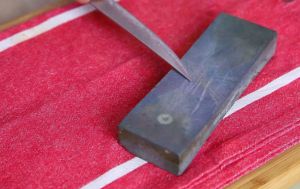 Flip the knife and begin sharpening the one side of the knife on the fine grit side of the stone. Again, make sure you hit both sides of the knife with the fine grit.
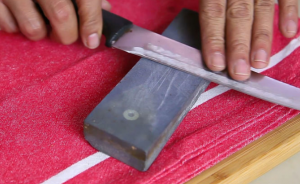 Begin alternating swipes on the fine grit. Sharpen one side of the knife with a single stroke, then immediately flip the knife and sharpen the other side. Do this several times for the best result.
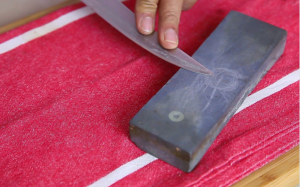 If you wish, further polish or even strop the edge to the desired sharpness. This makes the edge better suited for “push cutting” (cutting directly into materials, pushing straight down without sliding the blade across the object) but generally impairs slicing ability: without the “microscopic serrations” left by grinding with a stone, the blade tends to not bite into things like tomato skins.
